
Categories

Month: April 2025

How to Optimize Your Images for a Website (AM02-08)

“Every pixel is a signal. Treat your images like content, not decoration.”
– Schieler

Foundations: Image SEO & Optimization Strategy

Image optimization isn’t just about compression, it’s about communication. Properly optimized images reduce load times, increase crawlability, and reinforce keyword relevance across the board. Done right, your images become contextual signals that support the page, not just visual fluff.

Images without intent are dead weight. Images with metadata are keyword artillery.

Before We Begin…

  • Get the images early: Ask clients for 10+ images per service during onboarding. Don’t wait till the build is half done.
  • Use the onboarding call: Prompt them to come ready with folders, Google Drive, or Dropbox links.
  • Choose your tools: Lightroom, Photoshop, or any software that supports batch resizing and metadata editing.

Optimization starts with prep. What you get early defines how clean your outputs are.

Step 1: Resizing Images

  • Big files slow your site down. Resize using “long edge” between 1200 and 1600 pixels.
  • Never upscale low-quality images. You’ll just pixelate junk.
  • Edit for basic clarity: brightness, contrast, and sharpness go a long way.
  • Preferred tools: Photoshop, Lightroom, or similar with export presets.

Capture One Export Settings:
Resize long edge: 1600px
File type: JPEG or WebP
Quality: 70-80%

Load speed is a ranking factor. Image size is your lever.

Step 2: Renaming Images

  • Hero and First Image on Page: Always include location and service in the file name.
  • Examples: painter-cedartown-ga-hero.png, painting-contractor-cedartown-ga.jpg
  • Other On-Page Images: Focus on secondary keywords. Location tag optional unless helpful.
  • Examples: painting-contractor-refinishing-drywall-sheetrock.png
  • Non-Service or General Pages: Name based on content. Use for “about”, “contact”, or trust-building images.
  • Examples: team-photo-of-xyz-company.jpg, contact-the-team-xyz-company.jpg

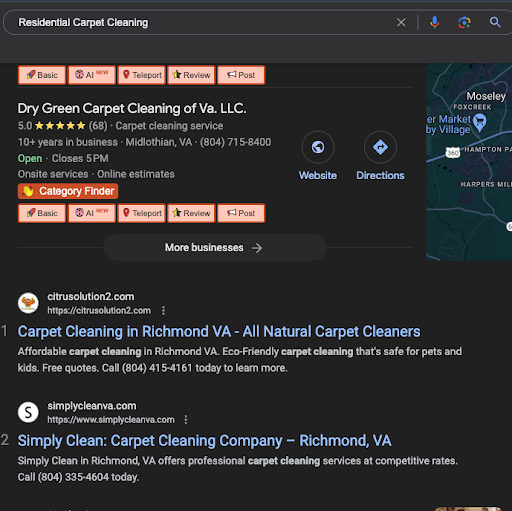
Google reads file names. Use them to reinforce your on-page targeting.

Step 3: Adding Metadata

  • Alt Text: Add in WordPress or your CMS. Defaults to filename unless manually updated. Add purpose and keywords if relevant.
  • Descriptions: Use to describe the image clearly. Helps accessibility and clarity for both users and crawlers.
  • Copyright Tag (EXIF): As of April 19, 2025, Google only parses the Copyright field. Put your keywords and geo info here if you are embedding metadata.

Example: “Professional Painting Services in Dallas, TX | Latitude: 32.7767, Longitude: -96.7970”

Metadata is dying in SEO, but the smart ones still squeeze juice where it counts.

How to Add EXIF Data in Photoshop

EXIF data is metadata embedded directly into your image file. Google used to parse multiple fields but now only respects the Copyright field. This is your last chance to attach keyword and location context at the file level.

  1. Open the image in Photoshop.
  2. Click File > File Info.
  3. Go to the Copyright field (ignore everything else).
  4. Type a natural sentence including your service and city. Example: Exterior Painting in Richmond VA | Latitude: 37.5407, Longitude: -77.4360
  5. Click OK and save the image with the new embedded metadata.
  • Pro tip: Use a spreadsheet to track which images you’ve tagged, especially on large sites.
  • Legal bonus: This field also protects you with a traceable ownership claim.

Tiny field, big impact. Only takes 30 seconds.

Step 4: File Format and Delivery

  • WebP is preferred: Use WebP or make sure your builder converts it during upload.
  • Fallback formats: Keep JPEG or PNG versions for compatibility in rare cases.
  • Avoid plugins: Convert and optimize images before upload to keep your stack lean.

Fewer plugins means faster sites. Handle your images up front.

Common Mistakes to Avoid

  • Uploading 5MB images: Nope. Resize it first.
  • Skipping alt text: That is a missed opportunity. Always describe the image purpose.
  • Using stock photos everywhere: Lowers trust and conversion. Use real imagery from the client when possible.
  • Duplicate file names: Especially on spun or location pages. Confuses crawlers and reduces index coverage.
  • Not using next-gen formats: WebP is lighter and faster. Use it when you can.

Images should build authority, not load time and bounce rate.

Recommended Tools for Image SEO

Editing and Metadata Tools

  • Adobe Bridge: Great for organizing and batch metadata changes
  • Lightroom: Excellent for quick edits, resizing, and exposure tweaks
  • Photoshop: Required for embedding EXIF data in Copyright field

Conversion and Performance Tools

  • Squoosh.app: Super simple image compression and WebP conversion
  • GTmetrix: Load speed and waterfall testing
  • Google PageSpeed Insights: Core Web Vitals and mobile friendliness

WordPress Plugins (if you must)

  • ShortPixel: Compression and WebP support, one of the best in the game
  • Smush: Easy to use for basic image compression inside WordPress

Tools don’t fix strategy. Know what you’re doing before you automate.

How to Structure a Website for Multi-Service Businesses (AM02-07)

“Structure is strategy. Rank follows clarity.”
– Schieler

Foundations: SEO Theory & Silo Models

In SEO, structure isn’t just technical,  it’s strategic. It’s how you express purpose, hierarchy, and intent across your site. There’s no one-size-fits-all model. Your ideal structure depends on domain authority, scalability goals, and how clearly you can communicate topical relevance to both humans and search engines.

A messy structure weakens your message. A clean structure amplifies it.

Flat Architecture vs Silo Structure

  • Flat Structure: All pages live one level deep off the root. This makes crawling easier and spreads PageRank evenly. Works great when you’re light on backlinks or early in site growth.
  • Silo Structure: Groups pages by category, topic, or location. Helps build topical authority and control internal PageRank flow, but it requires more planning, more backlinks, and more upkeep.

Think of PageRank like water: a flat site is a sprinkler. A siloed site is a directed hose.

Physical vs Virtual Silos

  • Physical Silos: The hierarchy is visible in the URL, such as /services/city/service-name. This enforces structure but adds depth.
  • Virtual Silos: Structure created through internal links and menus, even if URLs are flat. More flexible, faster to build, but relies on thoughtful link strategy.

Both are valid. The best approach is the one you’ll maintain and scale. Just ensure every page lives in a coherent neighborhood of related topics.

Google doesn’t just read pages , it reads context. Your structure tells the story before your content does.

Step 1: Initial Planning

  • Use the Keyword Research SOP (AM05-01): Define your services and locations based on actual demand.
  • Choose your model: Service-First vs Location-First, structure your site around what customers search for most.
  • Draft your sitemap: Use spreadsheets, whiteboards, or diagrams to map out page types, paths, and relationships.
  • Plan your links: Each page should link to its parent and sibling pages to form a strong internal mesh.

Strategy before structure. The smartest layouts come from knowing what your users actually need to find.

Step 2: Structure Options

Option 1: Flat with Virtual Silos

https://www.example.com/painting-richmond-va
https://www.example.com/painting-virginia-beach-va
https://www.example.com/drywall-richmond-va

  • Group content using sidebar menus, footers, or service-area navigation blocks.
  • Interlink services within the same city and cities for the same service.
  • Quick to build, easier to maintain, ideal for service businesses targeting multiple local areas.

Option 2: Physical Silos

https://www.example.com/services/
└── richmond/painting/
└── richmond/drywall/
https://www.example.com/locations/
└── virginia-beach/painting/

  • Use WordPress parent/child pages or directory nesting to reflect hierarchy.
  • Set permalinks thoughtfully , /category/post-name works, but keep slugs short and purposeful.
  • Ideal for businesses expanding in scale, or sites with editorial content needing strict topical flow.

Build with expansion in mind. Every layer of depth should serve a reason, not just a format.

Step 3: Interlinking and CRO Optimization

  • Homepage: Link to core service categories and top-level location overviews.
  • Services: Link to every city-specific version of that service.
  • Locations: Link to all services available in that city or region.
  • Link from everywhere: Menus, breadcrumbs, footers, body copy, and CTAs, all help distribute flow.

Structure is static. Links make it dynamic. They guide both users and search engines through your value paths.

Step 4: Launch Best Practices

  • 70% Duplicate Content Rule: Vary intros, headings, CTAs, testimonials, and local offers.
  • Templates are your friend: Use consistent layouts to build fast, then personalize what matters.
  • Meta optimization: Use tools like Zynith SEO to dynamically populate titles, descriptions, and schema.
  • Update your sitemap: Especially if you’re adding new paths or deeper silos. Submit in GSC.

A launch isn’t a finish line, it’s your runway. Clean launches index faster, rank smoother, and convert stronger.

 Advanced SEO Structure Insights

  • Breadcrumb schema: Improves crawl clarity and gives users visual context.
  • Canonical tags: Required for duplicated layouts (like service+location combos).
  • Authority sculpting: Link from weaker utility pages (TOS, privacy) toward stronger conversion pages.
  • Contextual anchor variety: Use partial match, semantic, branded, and question-based links.
  • Prevent dead ends: Every page should give and receive meaningful links.

You’re not just building a site,  you’re constructing an ecosystem. Every link is a lifeline.

Common Mistakes to Avoid

  • Only using nav links: In-content links carry more semantic weight. Use them liberally.
  • Over-nesting: Too many slashes or folders dilute equity. Stay lean.
  • Launching thin pages: Avoid pages under 300 words unless they serve a utility function.
  • Not linking to new pages: Orphan pages waste content, always integrate into the internal link web.
  • Skipping sitemap + indexation checks: New builds must be submitted and monitored in Search Console.

Most SEO errors come from assumptions. Be deliberate. Be structural. Be indexable.

Book List to Sharpen Your SEO & Audit Skills

SEO Fundamentals & Strategy

  • The Art of SEO by Eric Enge
  • SEO 2024 by Adam Clarke
  • Product-Led SEO by Eli Schwartz

Content, Copywriting & Influence

  • Everybody Writes by Ann Handley
  • Building a StoryBrand by Donald Miller
  • Influence by Robert B. Cialdini

Video Creation & YouTube Growth

  • Tube Ritual by Brian G. Johnson
  • YouTube Secrets by Sean Cannell & Benji Travis
  • How to Shoot Video That Doesn’t Suck by Steve Stockman

Mindset, Workflow & Business Systems

  • The 1-Page Marketing Plan by Allan Dib
  • Deep Work by Cal Newport
  • Atomic Habits by James Clear

How to Do Keyword Research (AM05-01)

Resources

Step 1 – Seed Keywords

Part of how search algorithms connect searchers with web pages that meet their needs is by matching the words on a web page  (headings, content, alt tags, image names, etc.) with the search terms used by the searchers, as well as related terms.

The goal of keyword research is to identify the variations (seed keywords) of your main services that are most frequently searched ( highest search volume). This maximizes the number of searches that are matched to  your website. Understanding your seed keywords can help give you a full perspective on your client’s industry, which is especially important when working in a new or unfamiliar niche. 

Identifying Your Competitor(s)

First, identify your highest-ranking example (competitor) in the state or nationwide, (especially if you live in a smaller city) to understand how service pages are organized and identify “Seed Keywords”. Use the Actual name of the services to identify these seed keywords.

To do this, manually type your client’s services in Google Search in the locations near your client’s service area. Use a VPN to ensure you get the most relevant localized search results for each service and location. Identify the top-ranking competitor that best represent the majority of your new client’s service offerings within your target location.

Am05 01 1

Use your client’s and competitor’s navigation to find potential seed keywords.  Compare these keywords to the services offered by your client as well. In this example, let’s assume area rug cleaning is a service our client wants to offer. 

Am05 01 2

Next, plug the keywords into Google Keyword Planner, focusing on keyword user intent and the services you’re trying to optimzie pages for. (This refers to understanding what users are looking for when they type in a set of keywords. For example, if someone searches for “area rug cleaning near me” they are looking for an area rug cleaning service, not information on how to clean it themselves.).  Next, plug the keywords you identified into Google Keyword Planner, keeping in mind the importance of user intent. This refers to understanding what users are looking for when they type in a set of keywords. For example, if someone searches for “area rug cleaning near me” they are looking for an area rug cleaning service, not information on how to clean it themselves. By plugging in various options, you can gain a better understanding of the specific keywords that have the highest search volume. 

In order to get results relevant to a specific geographic area, make sure to search in an account currently running ads and change your location to match the state as shown below. This can help with the differences in vernacular and verbiage in different locations of the country.

Search with AND without modifiers like “residential”, “commercial”, etc. to gain a full picture of the best seed keyword choice.

Am05 01 3

– carpet cleaning has the highest search volume in the result

Repeat this for each of the services your client offers to get a list of service “Seed Keywords” that you can use that have the highest search volume. 

Step 2 – KW Brainstorming

Go to AM Entity Analyzer and enter your seed keywords along with your location modifiers (eg. “residential area rug cleaning, Commercial rug cleaning”) This helps identify keywords related to your seed keyword. Using the Keyword Tool on the salience page, review the AI-suggested related keywords (LSI). These are variations or related entities to the provided keyword that could enhance your keyword strategy. We recommend taking the top ~10 of these keywords. We will use these in the next step to identify overlap.

LSI is the mathematical method used by search engines to understand the context and relationship between words and phrases in a piece of content. LSI keywords are words or phrases that are semantically related to the main keyword. For example, LSI keywords for area rug cleaning would be carpet cleaning, rug maintenance, professional cleaning, etc. Using multiple keywords within the same content makes it clear what a page is about.

Am05 01 4

By organizing our keywords into seed keywords and then adding the secondary keywords, we now have a strong list that we can use to identify potential keywords to use in headings and in body content. Next, we need to confirm overlap using the list we just developed.

Am05 01 5

Step 3 – Selecting Optimal Keywords 

We are now going to select our optimal keywords based on the traffic potential and make an educated decision to focus on the service + Location specifically. We will now select our optimal keywords by evaluating their traffic potential and relevance. By focusing on keywords that specifically combine the service with the location, we ensure the content attracts the most targeted and relevant traffic to the site.

Keyword Overlap Analysis

Google’s understanding of specific keywords is not always the same as ours as a searcher. This means, Google links related keywords and can show overlapping results in the SERPs.

Our Goal – Create a Page Optimized for the HIGHEST search volume while also AVOIDING any KW overlap. We can test that using the tool below: 

Am05 01 6

As you can see in the example image, the provided keywords have 7 repeated URLs in the search results (meaning 7 web pages were returned in the search results)  – this signals a very strong overlap, and one of these keywords should be removed from your list (the one with lower search intent, volume, etc)

Now we will remove any of the irrelevant keywords from the groups we created earlier based on their association with a similar service. This alignment can be confirmed using the overlap tool and comparing the list of ~10 keywords that we set aside in the previous step – notice we are using location modifiers at this step now to compare overlap.

– Pet Stain & Odor Removal San Jose CA, pet stain removal San Jose CA

Checking Overlap on Main Services

If the previous steps were completed successfully you should not have any overlap between your Service Seed Keywords. Now is a good time to check, however. When comparing your seed keywords with a city modifier you should have little to no overlap (under 3 URLs) ideally. Notice in this example there is zero overlap.

Am05 01 7

Semantic Keyword Clustering

As we narrow down our list of primary keywords to optimize each page, we will also keep track of related terms. These additional terms can help the page rank for multiple keywords, provide context, increase the potential for ranking for the primary focused keyword, and improve the overall search engine ranking.  

After completing this process for all of your keywords you should have a list that looks like the following with a seed keyword (best fits your intent, search volume, etc.), followed by a list of other keywords that have similar overlap .In our example, we have replaced the location with a variable [city] as we plan to make pages for multiple cities:

[city] Tile & Grout Cleaning, Tile Cleaning in [city], [city] + Grout Cleaning, Tile and grout cleaning company [city]

This should build the foundation for you to lay out your sitemap and menus for your website. Once you have confirmed your sitemap is properly created, you can begin to create the content using those keywords in the Headings, page content, image filenames, alt text, etc where it makes sense using the content creation guide below.

Selecting Your Locations

During your onboarding process with the client, you should have gathered a rough outline of the service area that your client wants to optimize for as well as the base location of their GMB (This will be your base city location).

How to Strategically Optimize Your Content (AM05-03)

SEO is an iterative process, meaning we will continue to improve our content regularly and test until we get the proper result (Ranking Position 1). Consider the following best practices for content creation and optimization.

Meta Titles & Descriptions

Use primary keywords, synonymous keywords, and inverse terms. These are typically set within your SEO Plugin options on a per-page basis. Titles and descriptions over 60 characters (titles) & 160 characters (descriptions) may be truncated. You can use this to your advantage to increase Click Through Rates.

H-Tags

H-tags are organized in a hierarchy structure beginning with H1 → H6 from most important to least important. Use your main keyword in your H1 tag, and use inverse and variations of your keywords in your H2 Tags on the page. Avoid using keywords in H3 Tags as topic depth doesn’t justify it.

Industry Based Language

Use industry-specific adjectives identified through Google Images. Attempt to mirror the ratio of use of these keywords to the top three ranking results in the Google SERPs

– for plumbing, include “Technician” commonly appears together

Proper HTML Formatting

Use appropriate HTML tags for headings. For decorative headings without keywords, use a <p> class instead of a <div> or heading class

Topical Focus

Write content with a focus on the overall topic rather than individual keywords. Your goal is to ensure your content is comprehensive and covers the subject in-depth to provide value to readers that would be searching and finding your content. 

Logical Content Flow

It’s important to craft your content in a way that is both optimized for search engines AND written for human readers. This requires a delicate balance to properly create but you must keep headlines keyword-centric and natural. Use the following guide to establish your page sections as best practices.

  • Hero Section: Start with the benefits and values listed below the H1.
  • Introductory Paragraph: Use primary keywords at the beginning of sentences.
  • H2 Headlines: Include primary and synonymous keywords in H2 headings.
  • About The Company Section: Ensure this is well-placed within the content flow.
  • Testimonial Section: Headlines like “What Our Clients Say About [Keyword]”.
  • FAQ Section: Headlines such as “FAQ About [Keyword]” should be used.

Your Content-Length

Content length used to be a far more important feature to consider. You can gain an idea of a general range for content length by analyzing the ranking results in the SERPs however maintain at least an 1100 word content length as a general rule of thumb.

Keywords in Images & Alt Text

Incorporate primary and synonymous keywords in image names as well as inside of your alt tags. Ensure alt tags align with the content of the page for relevance. It’s important to make sure you are titling the images in a natural and logical manner and AVOIDING keyword stuffing into the image filenames & Alt Text.

Using the Zynith Salience Tool

We can use the Zynith Salience tool to understand what Google thinks are the primary topics of your content or a competitor’s. Then, adjust your content to align more closely with desired salience levels. Focus on topics rather than individual keywords

Begin by adding your page URL into the URL field and click “Find Salience” to scrape the page content.

NOTE: If that doesn’t work, your hosting / CDN may not allow the scrape. In that case, copy ALL (cmd+A, cntl+A) page content then paste it into the second field, and click “Find Salience”

Am05 03 1

Am05 03 2

The Salience tool will then output what it believes the Salience is for the page content. It will output a series of boxes with the following attributes:

  • Salience: The level of prominence of that entity in your KW (Optimization goal)
  • Present In: The Tags and Locations On-Page the entity was found
  • Wikipedia: If there is a Wikipedia article for the entity it will show

Modify your content as needed and re-run the Zynith Salience Analyzer to ensure proper keyword integration and optimization. Verify that the keywords and entities are prioritized correctly from highest to lowest Search Volume for similar intent keywords and entities.

Additional Same Intent Keywords

We can also enhance the ranking of web pages by targeting additional keywords with similar intent. This brings more traffic to the page and website as a whole. 

Identify Your Keywords

Determine the highest search volume keyword that the page should rank for or is already ranking for by using any of the following tools

Find keyword suggestions provided by Google’s NLP algorithms by entering the primary keyword into the Zynith Salience keyword tool to generate a list of similar intent keywords and entities.

Am05 03 3
– Results from Zynith Salience Keyword Tool for “Plumber Tucson” as the main KW

Keyword Overlap Analysis

Google’s understanding of specific keywords is not always the same as ours is as a searcher. To simplify, google can and does maintain relationships between specific keywords and can have some “overlap” in how it provides results in the SERPs.

Am05 03 4

As you can see in the example image, the keywords have 8 repeated URLs in the search results – this signals a very strong overlap, and one of these keywords should be removed from your list (the one with lower search intent, volume, etc)

Now We will group all the relevant keywords into groups based on their association with a similar service so we can compare each set of keywords individually to identify what the best option is for the main optimization of the page. 

– Atlanta Plumber, licensed plumber in Atlanta, Atlanta plumbing company

NOTE: If the overlap rate is 50% or higher, the new keyword is a good candidate to add to your existing page as a “Same-Intent” Keyword.

Optimizing Your Content

Naturally, we need to integrate the new keyword into the content. We do not want to simply dump the keyword into the content. Consider the following:

  • H2 Tag: add your new keyword to a new H2 where it fits naturally
  • Paragraph Below the H2: Again, ensure it reads naturally
  • Zynith SEO Selience Analyzer

Next, Re-run the Zynith Salience Analyzer to ensure proper keyword integration and optimization. Verify that the keywords and entities are prioritized correctly from highest to lowest Search Volume for similar intent keywords and entities.

It’s important to make sure you track the performance of the additional keyword to monitor changes using your rank-tracking tool to monitor the new keyword’s ranking over the next month.

This iterative process ensures the web page is continuously optimized for high-value keywords, driving more relevant traffic and improving overall search engine ranking.

Website Spin and Bulk Page Duplication Process (AM02-05)

“Build once. Scale everywhere.”
– Schieler

Overview

Use this SOP to guide your team through the process of creating [Service + Location] pages in bulk using the Zynith – Local Bulk Page Creator. This powerful tool enables you to generate dozens or even hundreds of fully SEO-optimized local pages quickly using templated logic, structured input, and optional MySQL-based updates.

Before You Begin

  • Backup your site and database. This process can make mass changes to your posts and metadata.
  • Ensure your base location pages are completed: This means optimized content, image names, and SEO metadata are already in place.
  • Recommended Tools:
    • Zynith SEO Plugin
    • Yootheme Builder (optional for content templating)
    • Adobe Bridge (for bulk image renaming)
    • WP Engine Hosting (or similar)

Step 1: Create Your Page Containers

Navigate to Bulk Page Creator in your WordPress admin menu. You’ll be presented with a multi-block form where you’ll input:

  • Services: One per line — e.g., “Plumber”
  • Cities: Forward-slash separated with no spaces before or after — e.g., Tucson, AZ/Phoenix, AZ/Scottsdale, AZ
  • Meta Titles: Use dynamic shortcodes like [service] and [city] — e.g., The #1 [service] in [city] with 1,000 5-Star Reviews
  • Meta Descriptions: Prefilled suggestions using the same shortcode logic — e.g., Get professional [service] in [city]. Locally owned and IICRC Certified.
  • Custom Description (Suffix): Optional, used to complete your meta description sentence
  • Additional Content: Paste templated HTML, Yootheme export blocks, or clone existing pages.

Tip: Use the dropdown to select an existing page/post to clone from for quick template application. This automatically loads the post content into the new page container.

Page URL Controls:

  • Ad: Appends -ad to the URL
  • Landing Page: Appends -landing-page to the URL
  • Flip Service/City: Changes slug from [service]-[city] to [city]-[service]

Click “Create Pages” to generate your new page containers. These will be published live with the correct title, slug, and metadata but will contain cloned or placeholder content depending on your input.

Step 2: Insert Page Content

If using Yootheme Builder, apply a saved template to each page by editing via the frontend builder and loading your “Service A” or “Service B” saved layout. Match each template to its corresponding service + city page (e.g., /plumber-phoenix-az gets the Plumber template).

This step is optional if you’ve already cloned an existing page using the built-in Zynith dropdown before submission.

Step 3: Customize Page Content with MySQL

Once your pages are built and templated, use the built-in SQL Batch Updater to run location-specific find-and-replace commands across your post content.

How To Use:

  1. Go to Bulk Page Creator → SQL Batch Updater
  2. Export all page content to CSV using the “Export CSV” button
  3. Edit your CSV using the “Spin” sheet from your Master Tracking Document:
    • Column A: Page ID
    • Column B: Title
    • Column C: Find this text (e.g., “Richmond, VA”)
    • Column D: Replace with this city (e.g., “Phoenix, AZ”)
  4. Upload the edited CSV
  5. Review loaded rows and click “Run Batch Update” to execute

The SQL Batch Updater is case-sensitive. This means you’ll need to include all variations of the text you want to replace, including both capitalized and lowercase forms. For example, if your image alt text contains “Phoenix, AZ” and your image file name or slug contains “phoenix-az”, you must create two variations of the CSV to ensure everything is updated correctly.

This process allows you to dynamically swap in city names and service terms across all your pages in seconds. It programmatically changes the H1s, paragraph content, file names, and internal links for each page.

Step 4: Rename and Upload Images

Now that your image URLs and file names have changed, use Adobe Bridge or your preferred batch tool to:

    • Find and replace city names in image file names
    • Rename them to match the new slugs (e.g., plumber-richmond-va-hero.jpgplumber-phoenix-az-hero.jpg)

Drag all renamed images into your Media Library. The filenames will match your new content, and WordPress will automatically attach them where needed if referenced by the slug.

Step 5: Final Checks & Indexing

  • Check for: broken links, image loading issues, metadata accuracy
  • Submit your updated sitemap to Google Search Console to trigger indexing
  • Use the Zynith SEO Plugin to confirm meta titles, schema, and noindex rules are set properly

Website Launch Checklist (AM02-03)

“Going live isn’t the finish line, it’s just the beginning of the experience.”
– Schieler

Step 1: Review WordPress Settings

Objective: Ensure your WordPress configuration is production-ready.

Action Steps:

  • Go to Settings > Reading and confirm the homepage and blog archive pages are assigned correctly.
  • Verify permalinks are set to /post-name/.
  • Under Media Settings, uncheck “Organize uploads into month- and year-based folders.”

These should be configured during development, double-check before launch.

Step 2: Remove Demo Content

Objective: Ensure no placeholder or default content remains.

  • Delete any demo pages, posts, CPTs, and media added by the theme.

Step 3: Manage Themes

Objective: Reduce clutter and security risks from unused themes.

  • Navigate to Appearance > Themes.
  • Delete unused themes, keeping:
    • Your active theme
    • The parent theme (if using a child)
    • The latest default WordPress theme (e.g., TwentyTwentyFour)

Step 4: Update Contact Emails

Objective: Ensure site notifications reach the correct inbox.

  • Check admin email under Settings > General.
  • Update contact form recipient emails in your form plugin (e.g., Ninja Forms).

Step 5: Enable Caching

Objective: Improve site performance post-launch.

  • If using WP Engine, hosting-level caching is handled automatically.
  • If on shared or budget hosting, install a reputable caching plugin and test for conflicts.

Never activate caching until site development is complete.

Step 6: Image Optimization

Objective: Serve web-optimized images for performance and clarity.

Best Practices:

  • Name images using lowercase letters and keywords (e.g., roofing-company-dallas.jpg).
  • Use exact width x height in image tags (native sizing).
  • Use an image optimization plugin if your builder doesn’t automatically optimize.

Step 7: Setup a Backup Solution

Objective: Ensure the site can be restored if needed.

  • WP Engine handles backups natively.
  • For other hosts, install a backup plugin or activate a server-level solution.

Step 8: Clean Up Plugins

Objective: Remove development-only plugins and avoid bloat.

Recommended Plugins:

  • Zynith SEO or Yoast
  • Redirection
  • Ninja Forms
  • Better Search and Replace

Don’t use plugins as crutches for poor development. Less is more.

Step 9: Run Search & Replace (If Needed)

Objective: Update all URLs if you developed the site on a staging or temp domain.

  • Backup the database.
  • Use the “Better Search and Replace” plugin to update links sitewide.
  • WP Engine clients can request this directly from support.

Step 10: Point Your DNS

Objective: Connect the live domain to the new site.

  • Log into your domain registrar (GoDaddy, Namecheap, etc.).
  • Add/update the A record and/or CNAME to point to the new host.
  • Ask for help if you’re unsure. Never guess DNS settings.

Step 11: Unblock Site from Search Engines

Objective: Make the site indexable by Google and Bing.

  • Go to Settings > Reading.
  • Uncheck “Discourage search engines from indexing this site.”

This is the #1 most forgotten go-live task, don’t skip it.

Step 12: Submit Your Sitemap to Google

Objective: Start indexing your site and pages immediately.

  • Login to Google Search Console.
  • Select your domain property.
  • Navigate to Index > Sitemaps.
  • Submit: https://yourdomain.com/sitemap.xml

Use Zynith SEO for automatic sitemap creation + bonus: 50% off with code “AGENCYMASTERMIND.”

Step 13: Follow Google’s Design Standards

Objective: Align site layout with best CRO and usability practices.

Typography:

  • Body font: 16px
  • Headings: 24–96px
  • Line height: 1.5x font size

Buttons:

  • Min height: 48px
  • Padding: 12px (left/right), 24px (top/bottom)
  • Touch target: 48x48px minimum

Spacing & Layout:

  • Baseline grid: 8px
  • Gutters: 16px+
  • Column system: 12-column responsive grid

Responsive Design:

  • Breakpoints: 360px (small), 600px (med), 960px (large)
  • Use vw and vh units for fluid layouts

Accessibility:

  • Contrast ratio ≥ 4.5:1
  • 8px spacing between touch elements

Motion & Animation:

  • Duration: 100–300ms
  • Easing: ease-in-out preferred

Cards & Layout:

  • Card elevation: 1px default, 8px on hover
  • Padding inside cards: 16px

Navigation:

  • App bar: 64px height
  • FAB (Floating Action Button): 56px diameter
  • Drawer width: 320px on desktop, full width on mobile

Forms:

  • Field height: ≥ 56px
  • Error messages: 12px size, red or alert color

When you build by Google’s rules, your rankings and UX both win.

Book List for Web Design, Hosting, & Launch Mastery

Development & Deployment

  • Refactoring UI by Adam Wathan & Steve Schoger
  • Modern Web Development on the JAMstack by Mathias Biilmann

Hosting, Security & Maintenance

  • WordPress for Professionals by Peter MacIntyre
  • The Art of Monitoring by James Turnbull

User Experience & Design Systems

  • Don’t Make Me Think by Steve Krug
  • Designing Interfaces by Jenifer Tidwell

How to Do a Detailed Website Audit (AM02-01)

“You can’t improve what you don’t measure.”
– Peter Drucker

How to Conduct a Full SEO Audit

Objective: Use this standardized framework to identify SEO weaknesses, fix critical issues, and improve search performance across your site.

Instructions:

This audit follows a +0 / +1 scoring methodology. +1 indicates the item is already implemented properly. +0 highlights an issue or optimization opportunity with guidance for correction.

Remember that an audit is not a report, it is a roadmap to revenue.

Step 1: Technical Foundation

Access, Redirects & Core Functionality

  • SSL/DNS: Is traffic redirected to HTTPS and the preferred version (www or non-www)?
  • 301 Redirects: Are 301s configured properly for canonical versions and legacy URLs?
  • Secure Content: Are all assets loading via HTTPS with no mixed content?
  • DNS Configuration: Are nameservers and hosting environments stable?
  • Viewport Settings: Is the site optimized for device scaling via proper viewport tags?

Step 2: Performance & Load Optimization

Speed, Compression, Hosting Load

  • Page Speed: Does your average page load in under 3 seconds? Use Google PageSpeed Insights.
  • Header Requests: Is the total number under 35 for informational pages?
  • Page Size: Is the average size under 1MB, ideally 250–600KB?
  • Gzip Compression: Is it enabled and effective for at least 80% of data?
  • JavaScript Deferral: Is JS deferred for better load sequencing?
  • Cache Expiration: Are cache control headers set for 24hr–365d where applicable?
  • Hosting Load Time: Does Time to First Byte (TTFB) stay under 400ms?

Step 3: Crawlability & Indexing

How Search Engines Access & Understand Your Site

  • XML Sitemap: Is it present, correctly formatted, and referenced in robots.txt?
  • Robots.txt: Is it present, valid, and includes sitemap location?
  • Crawl Budget/Depth: Are important pages accessible within 3-clicks?
  • Error Codes: Any 400 or 500 errors? Fix or redirect these.

Step 4: Content Architecture & Internal SEO

Structure, Hierarchy & Readability

  • URL Structure: Are slugs clean, readable, and nested correctly?
  • Proper Siloing: Are blogs and content grouped into logical categories?
  • Bread Crumbs: Is navigation aided by visible breadcrumbs?
  • Internal Links: Are internal links strategic and well-distributed?
  • Schema Markup: Is structured data implemented sitewide and contextually?
  • Heading Structure: Proper use of H1–H3 tags with keywords?
  • Keyword Density: Are primary keywords clearly used and not stuffed?
  • Entity Relationships: Are relevant entities naturally mentioned in content?

Step 5: UX & Design Factors

Accessibility, Layout & Visual Hierarchy

  • Z or F Pattern: Does your design follow natural scanning behavior?
  • Contrast Ratio: Does text meet WCAG2 readability guidelines?
  • Tap Target Proximity: Are mobile tap targets spaced properly?
  • White Space: Is there adequate spacing between sections for readability?
  • Font Sizes: Is body copy at least 16px?
  • Line Height: Set to ~1.3 for optimal legibility?
  • Line Length: Are lines ~12 words wide on average?
  • Line Breaks: Are paragraphs short and left-aligned for easier reading?
  • Button Sizes: Do buttons meet Material.io accessibility guidelines?

Step 6: Visuals & Media

Optimization of Visual Content

  • SVGs: Are scalable vector graphics used where possible?
  • Image Optimization: Are images compressed appropriately?
  • Image Naming: Are filenames SEO-friendly with keywords?
  • Alt Tags: Are all images tagged with descriptive, keyword-relevant alt text?

Step 7: Meta Data & On-Page SEO

Title Tags, Descriptions, and Trust Signals

  • Meta Titles: Does each page include the primary keyword, ideally first?
  • Meta Descriptions: Are they compelling and keyword-rich?
  • Author Bios: Do blog posts include author names and bios?
  • People Also Ask: Are related FAQs or semantic questions included?

Step 8: Mobile Responsiveness

Cross-Device Compatibility

  • Responsive Design: Does the site work well across all screen sizes?
  • AMP: Is Accelerated Mobile Pages implemented if relevant?
  • External Fonts: Are font files minimized and properly served?
  • Breakpoints: Are CSS breakpoints set appropriately for devices?

Step 9: Content Relevance & Readability

Semantic Accuracy, Grammar & Industry Match

  • Word Choice: Do terms match the target vertical’s language?
  • Grammar & Spelling: Are all pages free of typos and errors?
  • YMYL Compliance: Does the site reflect trustworthiness in financial or medical spaces (photos, bios, SSL)?

Step 10: Backlink & Anchor Text Review

External Link Structure

  • Outbound Links: Are authoritative outbound links used (Wikipedia, .edu, accreditations)?
  • Backlink Anchors: Do backlinks use appropriate, non-spammy anchor text?

Audit consistently. Optimize strategically. Scale ethically.

Book List to Sharpen Your SEO Auditing Skills

Technical SEO & Website Auditing

  • Technical SEO Guide by Moz (Free Online Resource)
  • SEO Audit Workbook by Jason McDonald
  • The Art of SEO by Eric Enge, Stephan Spencer, and Jessie Stricchiola

On-Page Optimization & Copywriting

  • Everybody Writes by Ann Handley
  • Content Chemistry by Andy Crestodina
  • Exactly What to Say by Phil M. Jones

UX, Accessibility & Design Strategy

  • Don’t Make Me Think by Steve Krug
  • The Elements of User Experience by Jesse James Garrett
  • Designing for Accessibility by Heydon Pickering

New Client Onboarding Guide (AM01-06)

“On-boarding isn’t a formality, it’s the foundation of your entire relationship.”
– Schieler

Step 1: Gather Access to Client Properties

Objective: Secure the credentials and permissions required to begin delivering services immediately.

Action Steps:

  • Use our Onboarding Marketing Playlist to guide clients through access steps.
  • Maintain a standardized checklist for verifying access to each platform below.

Google Ads

  • Visit ads.google.com and sign in.
  • Click the gear icon → Access and Security → “+” → Add User.
  • Enter your email, set role to Admin, and set an expiration if needed.

Google Search Console

Google Analytics

  • Go to analytics.google.com and access admin panel.
  • Select “Property Access Management” → “+” → Add User.
  • Assign Admin role and click Send.

Google Tag Manager

  • Log into tagmanager.google.com.
  • Click Admin → User Management → “+” → Add new user.
  • Enter your email and set role to Administrator.

Google Business Profile (GBP)

  • Search “my business” while logged in → Select Business Profile.
  • Click 3-dot menu → Business Profile Settings → People and Access → Add User.
  • Enter email and select Manager role.

Meta Business Suite (Facebook)

  • Go to business.facebook.com and log in.
  • Click gear icon → People → Invite People → Add email and Admin role.
  • Confirm assignment and permissions before sending invite.

WordPress

  • Login to site (e.g., domain.com/wp-admin).
  • Go to Users → Add New → Fill out user info and set role to Administrator.
  • Confirm spelling of username, cannot be changed later.

DNS / Hosting (e.g., GoDaddy)

  • Login to domain provider → Account Settings → Delegate Access.
  • Select “Invite to Access” and enter your name and email.

Getting access upfront prevents delays later, don’t skip this step.

Step 2: Set Up Collaboration Systems

Objective: Organize a shared cloud-based space for assets and approvals.

Suggested Cloud Storage Options:

  • Google Drive
  • Dropbox
  • OneDrive
  • Box
  • iCloud

Asset Types to Collect:

  • Logos
  • Brand guides
  • Photos of team, office, work samples
  • Videos
  • Icons, social templates, ad graphics

Keep all creative assets in one central folder labeled clearly by client. Mutual organization is seen as teamwork!

Step 3: Complete the Branding & Info Intake

Objective: Capture critical business and brand information during on-boarding.

Reference the Master Tracking Document for the following:

  • Business Details:
    • Legal Business Name
    • Public-Facing Address (ask if public display is preferred)
    • Primary Email & Notification Email
    • Main Phone Number & Tracking Number Area Code
  • Website Details:
    • Live URL
    • Open Business Hours (for GBP & Listings)
  • Services & Differentiators:
    • List of Main Services
    • Unique Selling Proposition (USP)
    • Target Audiences & Client Demographics
  • Branding:
    • Hex Colors
    • Brand Fonts
  • Geographic Focus:
    • Service Area Coverage
    • Areas NOT served
  • Marketing History:
    • Past offers that worked (ads, promos)
    • What failed and why (client insight)
  • Social & Reputation Profiles:
    • Facebook, Instagram, LinkedIn, Yelp, DNB, BBB, YouTube, etc.
  • Internal Business Goals:
    • Job openings (hiring now or soon?)
    • Top 3 local competitors (as perceived by client)

The more you understand the brand, the better your content, SEO, and ads will perform.

Step 4: Confirm Readiness to Begin

Objective: Ensure all prerequisites are complete before onboarding ends.

Checklist Before Proceeding:

  • All platform access has been granted and tested
  • Creative asset folder is active and populated
  • Master Tracking Document is complete and verified
  • Kickoff call is scheduled or completed

A clean handoff = a smooth launch = a happy client.

Book List to Improve Client Onboarding & Retention

Process, Systems & Delivery

  • Built to Sell by John Warrillow
  • Clockwork by Mike Michalowicz
  • Work the System by Sam Carpenter

Client Experience & Retention

  • Hug Your Haters by Jay Baer
  • Delivering Happiness by Tony Hsieh
  • The Power of Moments by Chip Heath & Dan Heath

Marketing & Communication

  • Building a StoryBrand by Donald Miller
  • This is Marketing by Seth Godin

How to Conduct a Discovery Sales Call (AM01-05)

“You don’t close clients. You open conversations that build trust, through education.”
– Schieler

Step 1: Clarify the Problem

Objective: Understand the specific reasons the prospect took the call and what problems they’re trying to solve.

Action Steps:

  • Begin with a genuine question about why they booked the call:
    • “What made you take this call today?”
    • “What’s not working with your current marketing approach?”
  • Gather information on:
    • Lead flow or revenue performance
    • Frustrations with current agency/freelancer
    • Their definition of success
  • Identify their “measuring stick”, what they compare success against.

You can’t solve a problem until the client agrees they have one.

Step 2: Label Their Pain

Objective: Show empathy and demonstrate that you’ve listened and understood.

Action Steps:

  • Repeat back their pain points in your own words:
    • “So it sounds like [insert summary of concern], is that accurate?”
  • Slow down. Make space for correction or deeper clarification.
  • Use their language, not marketing jargon, to mirror their emotions and experience.

When they feel seen, they’ll be open to hearing your solution.

Step 3: Get the Full Overview

Objective: Uncover past experiences and frustrations to diagnose effectively.

Action Steps:

  • Ask about what they’ve tried:
    • “Tell me more about your experience with SEO/PPC/ads so far.”
    • “What worked, what didn’t, and why do you think that was?”
  • Take control gently if they ramble, guide the conversation with empathy.
  • Look for:
    • Previous agencies or campaigns
    • Internal resources or DIY attempts
    • Unresolved pain points

People buy when they feel heard, and like they’re not repeating the past.

Step 4: Sell the End Result, Not the Tactic

Objective: Paint the picture of what life looks like *after* their problems are solved.

Action Steps:

  • Avoid selling features (e.g., “meta descriptions” or “schema”)
  • Sell outcomes:
    • “We helped another roofer in Texas go from 2 to 15 leads/week without changing ad spend.”
  • Be honest. Don’t over-promise or create unrealistic expectations.
  • Use qualifying language:
    • “Every market is different, here’s what we’ve seen work based on what you shared.”

Clients don’t want to “buy SEO.” They want better results and less stress. They just call it SEO.

Step 5: Handle Objections Before They Arise

Objective: Build trust by acknowledging and pre-answering common concerns.

Action Steps:

  • Use story-based examples:
    • “Some of our clients were hesitant at first too, here’s what helped them move forward.”
  • Normalize their fear:
    • “I totally understand, I’m a business owner too. Here’s how I look at investments like this.”
  • Ask:
    • “Is there anything holding you back right now?”
    • “What’s your biggest hesitation with moving forward?”

A confident buyer is an informed one. Don’t hide from their doubts, lead them through them.

Step 6: Reinforce the Decision

Objective: Lock in their commitment with clarity and action.

Action Steps:

  • Send proposal and/or invoice *on the call* if possible
  • Use soft guidance:
    • “I’ll walk you through the proposal real quick just so you’re not left with any questions.”
  • Celebrate the decision before they have made it:
    • “I’m excited to partner with you, let’s make this the smoothest marketing experience you’ve ever had.”
  • Set expectations for on-boarding or kickoff timelines

Your tone should reassure: “You made the right move.”

Other Best Practices for Sales Success

Before the Call

  • Research the business:
    • Website, social profiles, Google reviews, ads, etc.
  • Prep a note stack to reference during the conversation.

During the Call

  • Take notes, especially on objections and goals.
  • Let them finish. Don’t interrupt their story or concerns.

After the Call

  • Send a recap email and assume the sale:
    • Summarize concerns, outline next steps, and attach your quote, contract or other way for them to start now.
  • Always follow up at least twice, silence doesn’t always mean “no.”

Follow-through is a sales superpower. Most won’t, so be the one who does.

Emotional Intelligence in Sales

Objective: Use empathy and awareness to lead the conversation with care and confidence.

Tips to Strengthen EQ:

  • Practice active listening: Focus on tone, pauses, and non-verbal cues.
  • Pause before responding: Give yourself a second to reflect before replying.
  • Mirror their energy: Match tone and pacing to create connection.
  • Don’t “solve” everything immediately, validate first.

When you lead with EQ, you become the trusted guide, not just another vendor.

Book List to Master Discovery & Sales Psychology

Sales Conversation & Closing

  • Sell It Like Serhant by Ryan Serhant
  • Way of the Wolf by Jordan Belfort
  • Closers Survival Guide by Grant Cardone

Emotional Intelligence & Buyer Behavior

  • Emotional Intelligence 2.0 by Travis Bradberry & Jean Greaves
  • Never Split the Difference by Chris Voss
  • What Every Body Is Saying by Joe Navarro

Consultative Selling & Psychology

  • SPIN Selling by Neil Rackham
  • Gap Selling by Keenan
  • Exactly What to Say by Phil M. Jones

Build Your Agency By White Labeling for Others (AM01-04)

“Your brand can be invisible, your value should never be.”
– Schieler

Step 1: Understand What White Labeling Really Means

Objective: Know what you’re getting into before you start pitching agencies.

Overview:

  • White labeling is when a more established agency rebrands your services as their own and resells them to their clients.
  • This is common in SEO, PPC, web design, content creation, and social media management.
  • You remain behind the scenes, while they maintain the client relationship.

Think of yourself as the engine, they’re just putting their logo on the car.

Step 2: Find White Label Opportunities

Objective: Build relationships with agency owners who need your help.

Two Proven Approaches:

  • 1. Be Helpful in Online Groups:
    • Join large SEO and marketing groups on Facebook, Reddit, and LinkedIn.
    • Engage by answering questions with insight and generosity, not vague generalizations.
    • Build rapport first. Add people as friends, message only after value is given.
    • Most white label partnerships form from referrals or helpful posts, not cold pitches.
  • 2. Pitch Agencies Directly:
    • Research and identify mid-sized agencies that might need fulfillment help.
    • Reach out with a personalized message and results-based proof of your capabilities.
    • Offer discounted white-label pricing and fast turnaround to increase appeal.

Be the kind of contractor *you* wish someone would send to your inbox.

Step 3: Develop Your White Label Pitch

Objective: Break through the noise with an authentic, value-first approach.

Action Steps:

  • Avoid “spammy” outreach, agency owners are constantly bombarded with generic pitches.
  • Don’t lead with a list of your services. Lead with results, speed, and reliability.
  • Use phrases like:
    • “I work exclusively behind the scenes with a few agencies…”
    • “Here’s how we recently helped an agency grow their client’s leads by 80%.”
  • Include:
    • Portfolio samples (remove identifying info)
    • Turnaround times
    • Clear pricing structure

Real pros don’t pitch, they provide solutions before being asked.

Step 4: Build Trust in Public Groups

Objective: Establish social credibility by showing up as a helpful expert.

Action Steps:

  • Join relevant groups:
    • Facebook: SEO Signals Lab, ClickFunnels, GHL Communities
    • Reddit: r/SEO, r/digital_marketing
  • Provide answers to real questions, give before you ask.
  • Comment on others’ posts with thoughtful insights or follow-up questions.
  • Once rapport is built, message members privately and begin conversations organically.

You don’t need to be the loudest, just the most helpful.

Step 5: Communicate Like a Pro

Objective: Prevent misalignment and misunderstandings through clear expectations.

Best Practices for White Label Communication:

  • Establish Communication Protocols:
    • Decide on weekly or bi-weekly check-ins.
    • Agree on where communication happens, Slack, email, Trello, etc.
  • Clarify Deliverables: Get specific about:
    • What is due
    • When it’s due
    • What format it needs to be in
  • Over-communicate: Ask questions before issues arise. Don’t make assumptions.
  • Understand Their Workflow: Ask for walkthroughs of their internal tools if needed.

Clarity now saves conflict later.

Step 6: Strengthen the Partnership

Objective: Ensure both sides win long term by aligning goals and process.

Action Steps:

  • Respect Their Brand Standards: Match their voice, formatting, and delivery style.
  • Adapt to Their Methodology: Even if it’s different from yours, deliver how they want it.
  • Sign NDAs if requested: Confidentiality matters, take it seriously.
  • Create Feedback Loops: Ask “What could we improve next round?”
  • Clarify Who Your POC Is: Know exactly who to talk to for task updates, reviews, or edits.

Be easy to work with, and they’ll keep bringing you business.

Step 7: Stay Flexible & Learn Their Systems

Objective: Integrate into their ecosystem and operate like an extension of their team.

Action Steps:

  • Be ready to use:
    • Asana, Trello, ClickUp for task management
    • Slack, Google Meet, Zoom for communication
    • GHL, SEMrush, Screaming Frog, etc.
  • Ask for onboarding videos or documentation if available.
  • If they have no SOPs, offer to build lightweight ones for smoother workflows.

The more integrated you are, the harder you are to replace.

Book List to Support Agency Fulfillment & Partnerships

Process & Fulfillment Systems

  • Work the System by Sam Carpenter
  • The E-Myth Revisited by Michael E. Gerber
  • Built to Sell by John Warrillow

Consulting, B2B Relationships & Value Delivery

  • The Win Without Pitching Manifesto by Blair Enns
  • Million Dollar Consulting by Alan Weiss
  • Pitch Anything by Oren Klaff

Communication & Trust

  • Crucial Conversations by Patterson, Grenny, McMillan
  • Radical Candor by Kim Scott
  • Never Split the Difference by Chris Voss